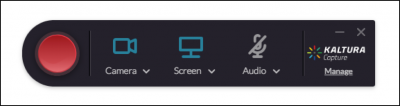
Input Device Options:
You can record a combination of your screen, camera, and audio. Each input device can be easily toggled on or off. Simply click on the device’s icon to switch between enabled/disabled. You can also click on the drop-down arrow next to the screen, camera, and audio icons to view a full list of options for each setting.
Screen and Camera Recording Options:
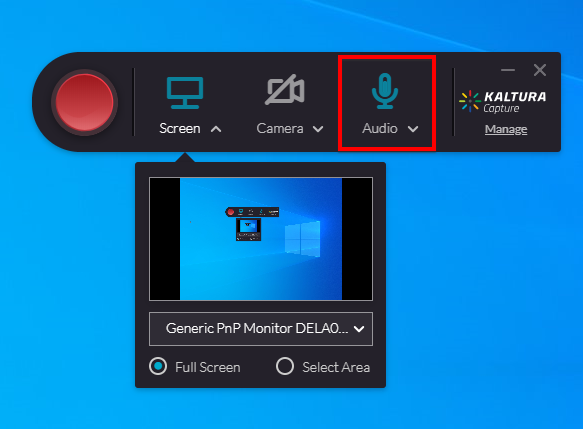
To preview your screen or camera recording, click the drop-down arrow next to the screen icon. A preview of your recording window will be displayed. If you have multiple screens, you can select between them here. You can either record your full screen or a select area.

Audio options:
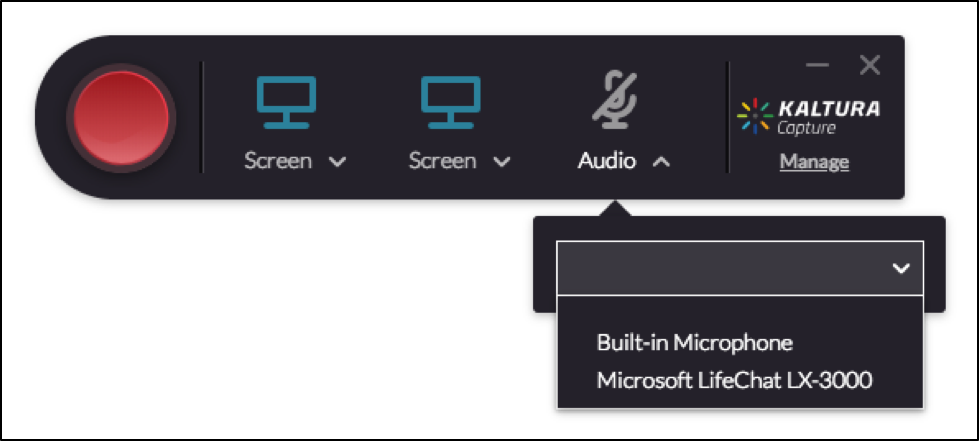
To view which microphone is recording, click the drop-down arrow next to the microphone icon. A preview of your microphone’s level should be displayed next to the icon. If you have multiple microphones connected to your computer, you can select them here.
Advanced Settings:
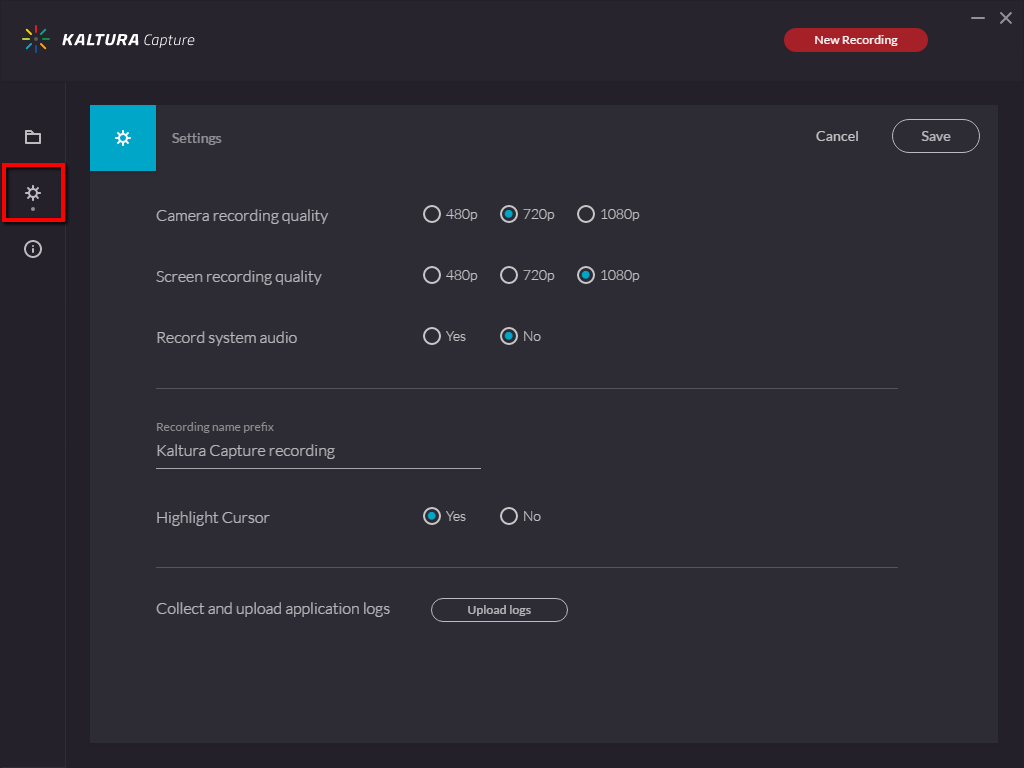
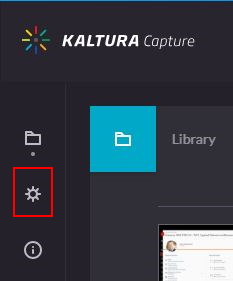
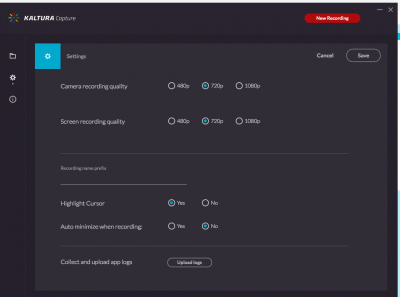
To access advanced settings options, on the right side click Manage. Next, click the settings icon on the left-hand side of the window. In the settings menu, you can select camera recording quality and screen recording quality. Click save after making any changes.
System Audio Recording:
System Audio Recording is the term used to describe recording the sound that would normally come out of your computer speakers.
Windows System Audio: you have the option to record system audio. If enabled, Kaltura Capture will record any audio played from your computer operating system. (iTunes, YouTube, audio from PowerPoint, etc).
Mac System Audio: you do NOT have the option to record system audio. Kaltura Capture does not record any audio played from your computer operating system at this time.
- Click the Manage link.

- Click the Settings (gear) icon.
- Select Yes next to Record system audio and click Save.
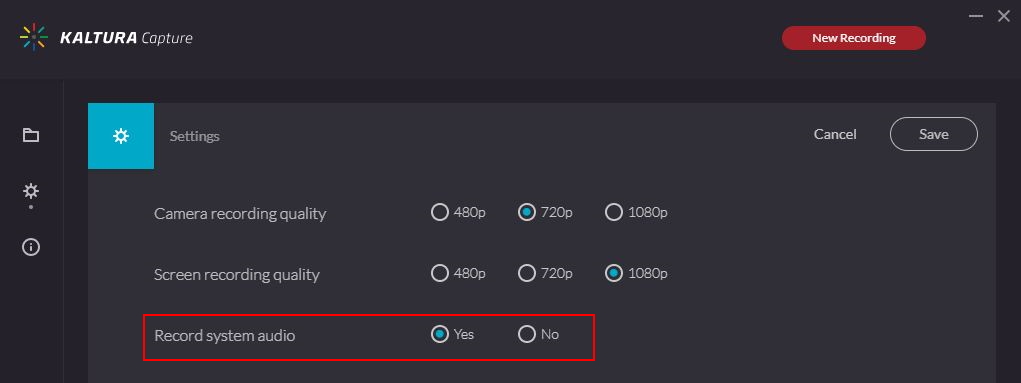
- The microphone option (Audio Button) must be turned on in the Kaltura Capture panel for system audio to be recorded. If you are only capturing system audio and do not want to capture sounds picked up by the microphone, use a USB headset microphone with a mute switch/button.
Minimize the recording timer and Tool Pallet:
Kaltura displays a Timer, Start and Stop controls and the White board tools in your recording by default. If you do not want this to be part of your recording you have two options;
- Minimize the tool before you start recording. (or after and trim out the part where you minimize it using the Kaltura editor). To do this click on the line that looks like a minus sign in the top right corner of the controls.
- In the Kaltura Personal Capture recording application click on Manage > gear icon > Auto minimize when recording > click Save.
Downloading Dual Screen Recordings:
Please note that you can only download the recording source selected in the Primary source selector (1). It is not possible to download the Secondary Source selector (2). See the image below for a visual of the Kaltura recording menu:
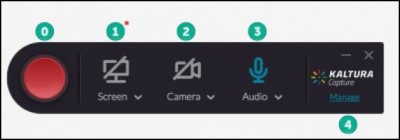
0 – Record Button
1 – Primary Source selector
2 – Secondary Source selector
3 – Audio selector
4 – Advanced settings menu
How to enable the Kaltura Capture security setting on MAC OSX:
Symptoms :
The screen error “Failed to stop recording. Please try again.” is displayed when attempting to stop the recording.

OSX security error
Cause:
Kaltura Capture is not allowed to record the content of your screen.
Solution:
Enable the security setting on MAC OSX using the following steps:
Close Kaltura Capture.
Go to ‘System Preferences’.
Click on Security & Privacy.
Go to ‘Screen Recording’ and check the box next to ‘KalturaCapture’ .
Note: If you attempt to enable the security setting on MAC OSX while Kaltura Capture is still open, a pop-up window displays instructing you to close the application for the changes to take effect.If you attempt to enable the security setting on MAC OSX while Kaltura Capture is still open, a pop-up window displays instructing you to close the application for the changes to take effect.